Quickstart
This guide walks you through creating and configuring a Research Assistant agent in the Vectara Console. In just a few minutes, you will have a working agent capable of searching the web to answer questions. The Create agent wizard lets you customize an agent including its model, instructions, tools, and other advanced options.
You can also build an agent conversationally with io, the Console AI assistant. io drafts the configuration from your intent.
Step 1: Create the agent and configure general settings
Start by accessing the Agents section and giving your agent a clear name and description to help identify its purpose and capabilities.
- Navigate to Agents in the sidebar.
- Click Add Agent.
The General information pane appears. - Add a Name like
Research Assistant. - Add a Description like
A research assistant that can search the web for current information.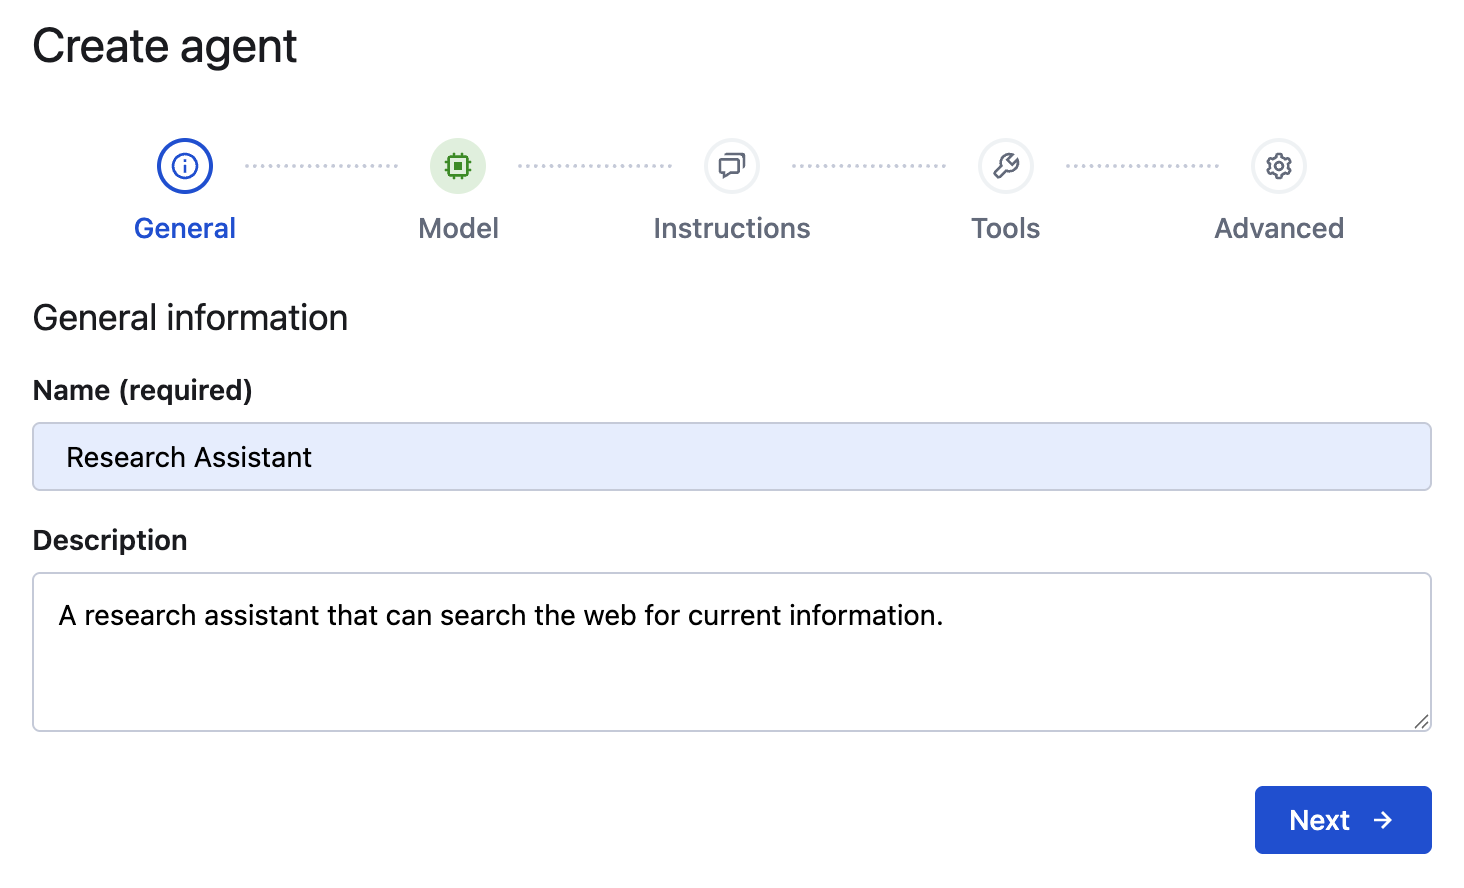
- Click Next.
Step 2: Select a Model
Choose the Large Language Model (LLM) that you want for your agent's reasoning. Then, configure the model parameters. We will set the creativity level with the temperature parameter.
- Select a Model name like
gpt-4o. - Set the
temperatureparameter to0.3.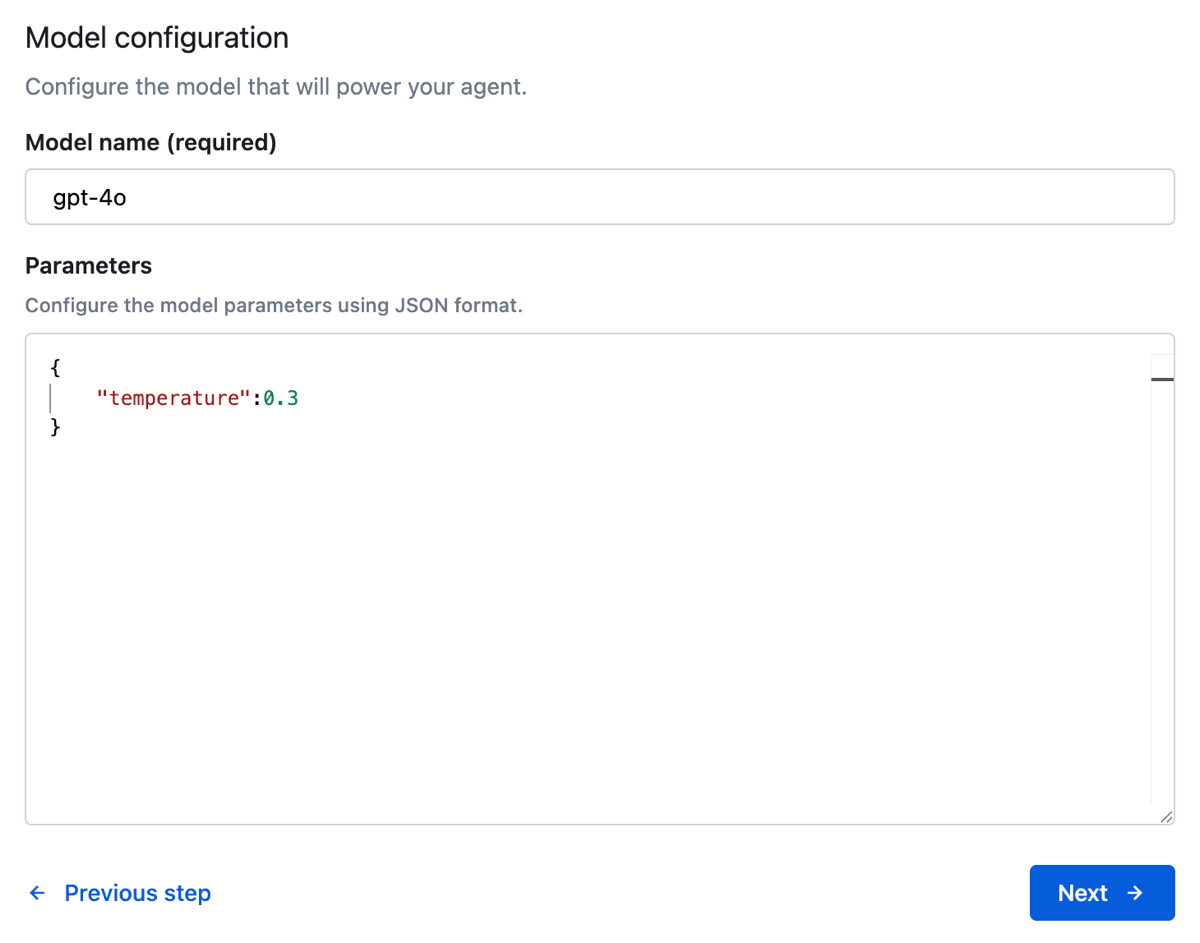
This temperature value provides more consistent results with factual
accuracy and low creativity. This 0.3 value is like a sweet spot for many
use cases involving Q&As, research assistants, and technical outputs.
3. Click Next to open the Instructions pane.
Step 3: Add custom instructions
Instructions define your agent's behavior, personality, and how it should approach queries. Custom instructions give you full control over the agent's responses. You can use our recommended instructions, or you can choose your own.
- Click Use our recommended instructions.
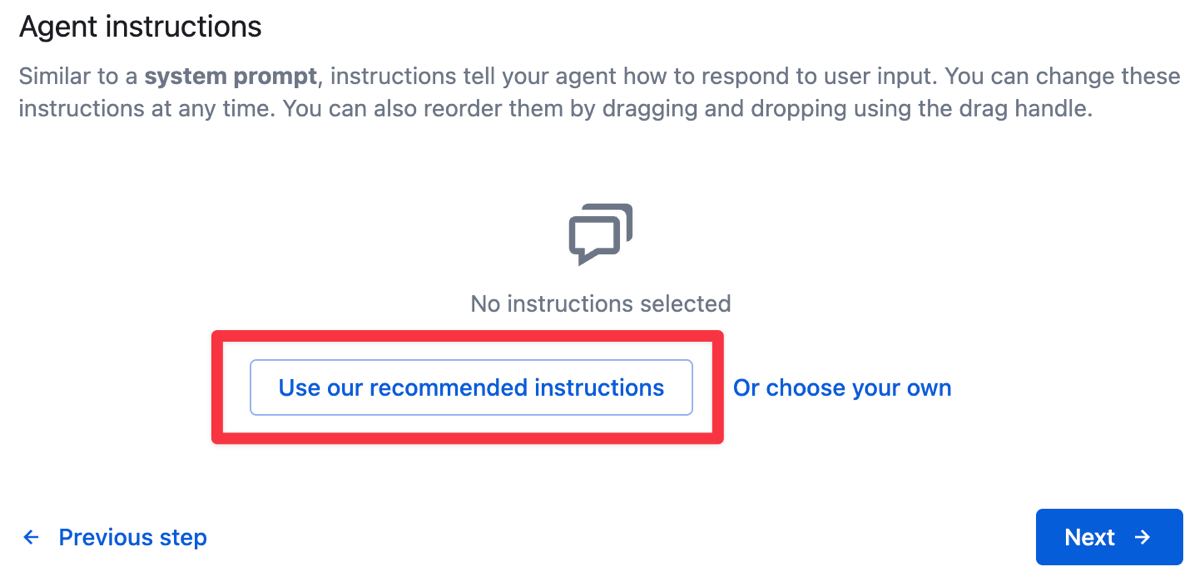
- Click Next to move to the Tools configuration.
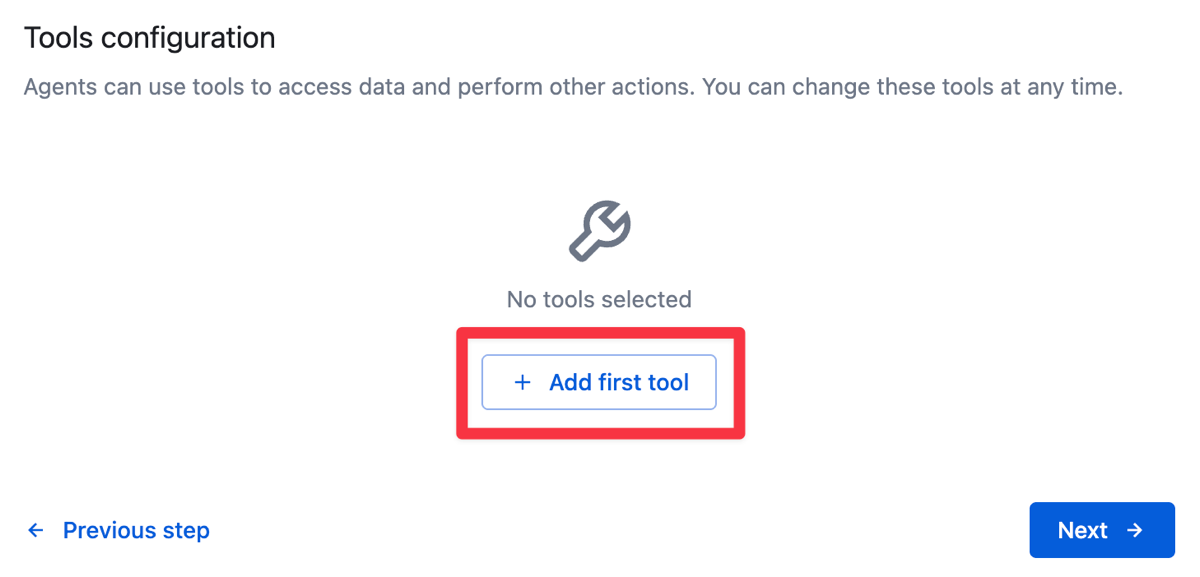
Step 4: Add and configure the Web Search tool
Tools extend your agent's capabilities beyond its base knowledge. Proper tool configuration helps the agent understand when and how to use the tool effectively.
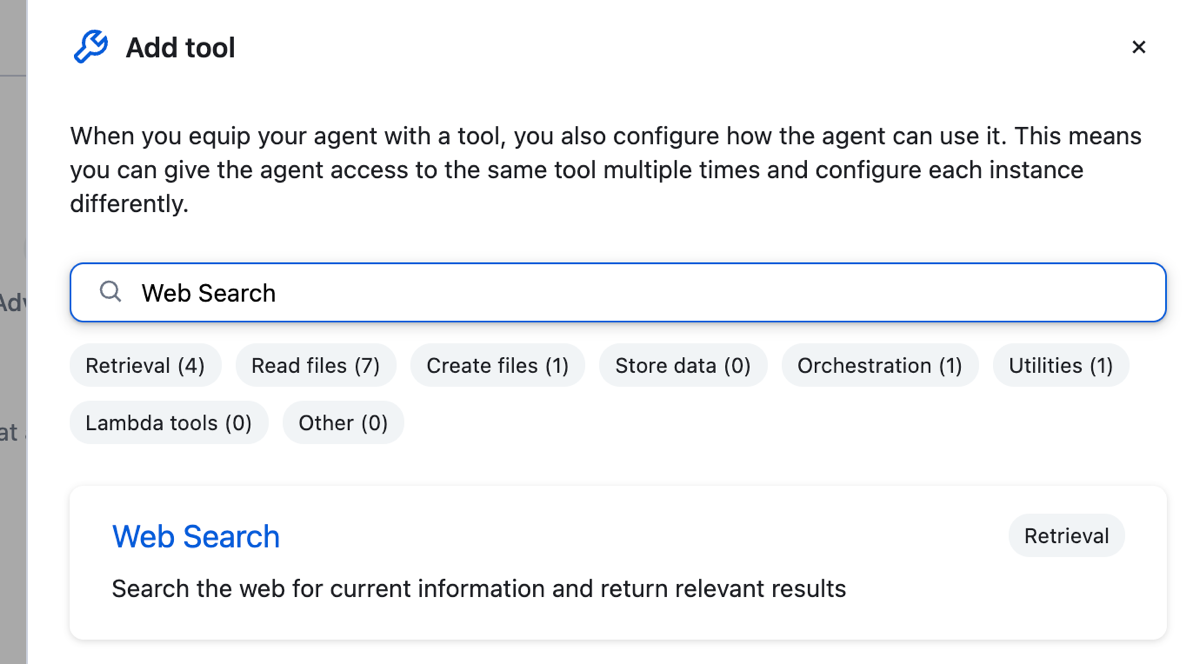
-
Click Add first tool.
-
Enter Web Search and select the tool.
-
Enter web_search as the Name and provide a description for this tool like:
The web search tool that find up to date information from trustworthy sources and returns concise summaries with links. Use when a query needs current facts external references or verification beyond internal knowledge. Prefer authoritative sites such as documentation government and academic pages and avoid low quality or speculative content.
-
Specify a Limit of
10results.
You can learn more about the other options such as query, exclude domains, and include domains in the API Reference.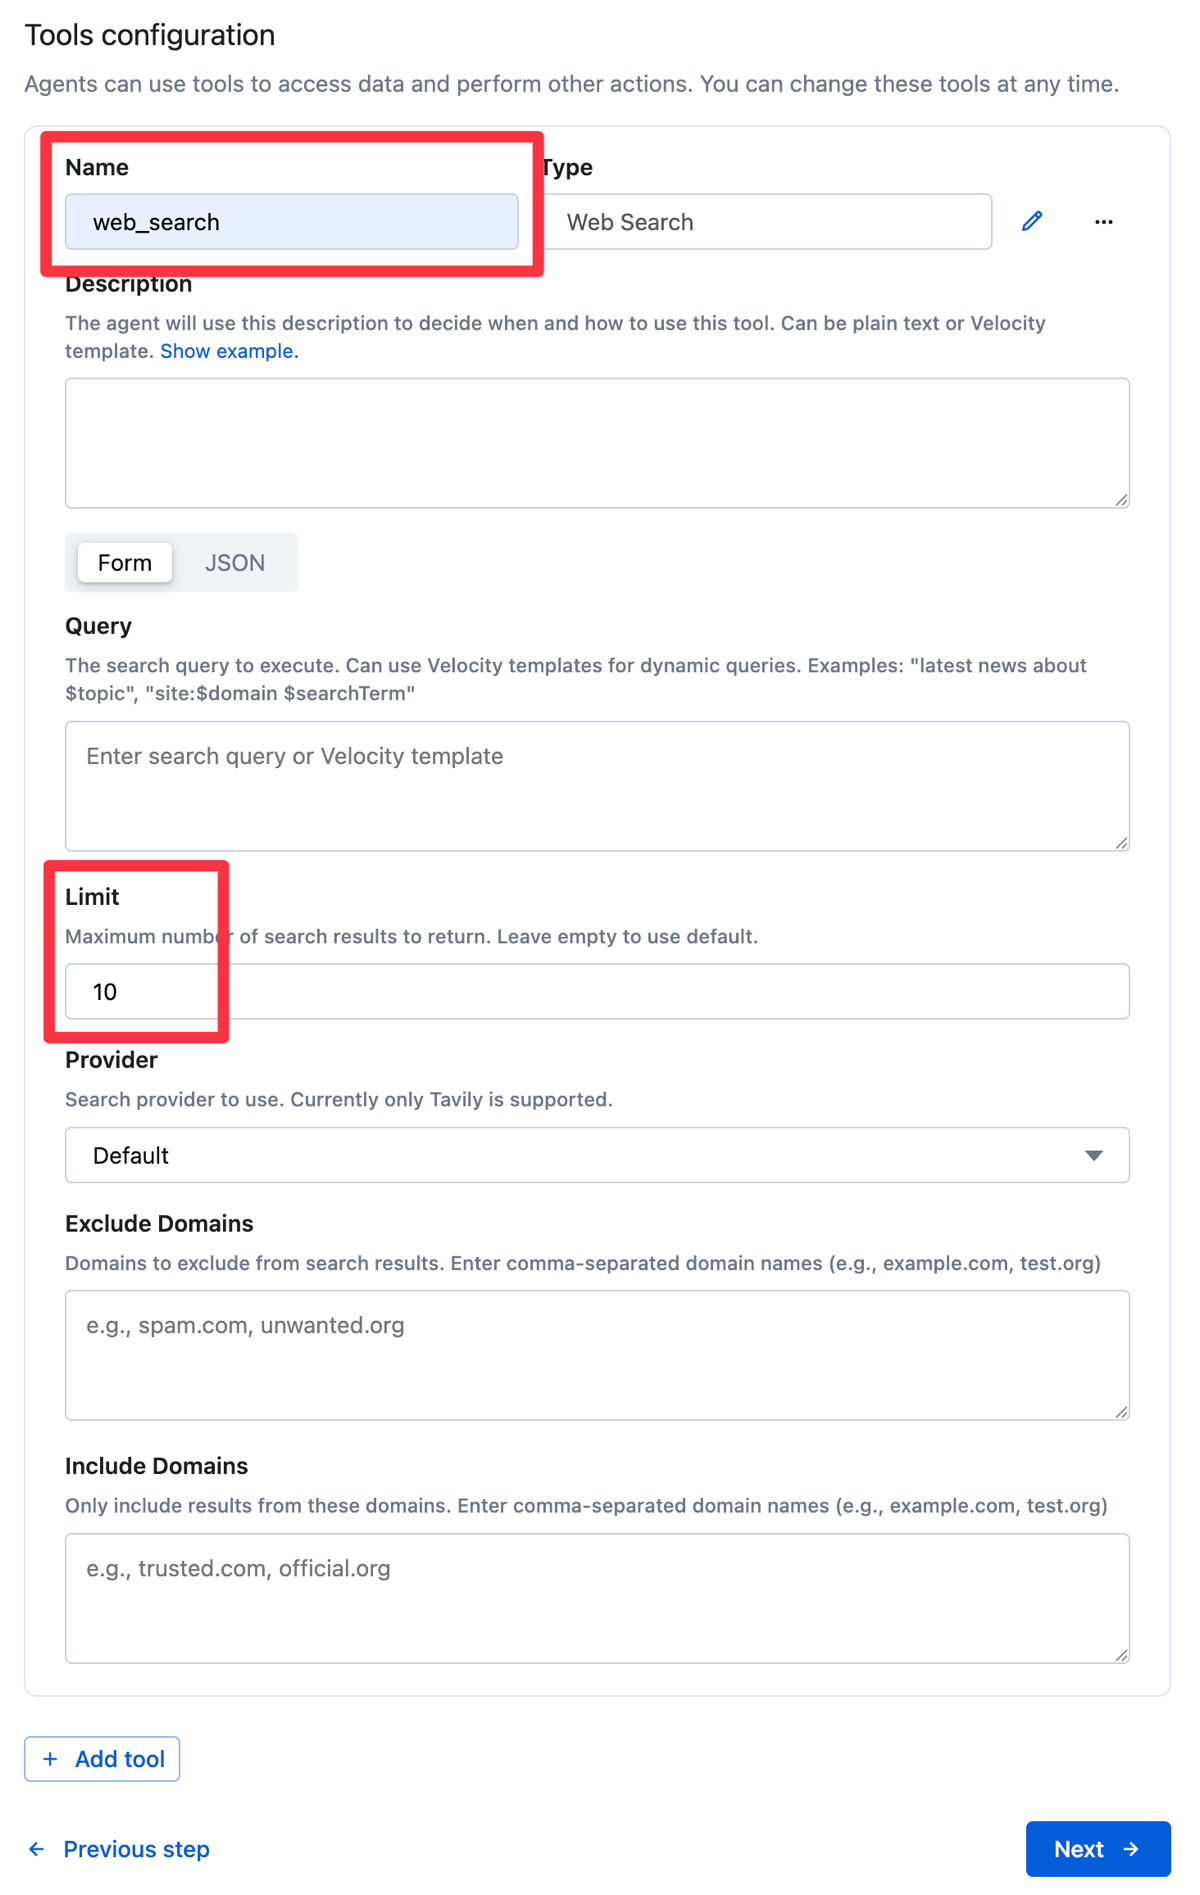
-
Click Next to move to the Advanced options pane.
Step 5: Add metadata
Metadata helps you organize and categorize agents, making them easier to find and manage as your agent library grows.
This final step of the wizard lets you add metadata to help organize your agent.
-
Add a Research category and version like
{ "category":"Research", "version":"1.0" }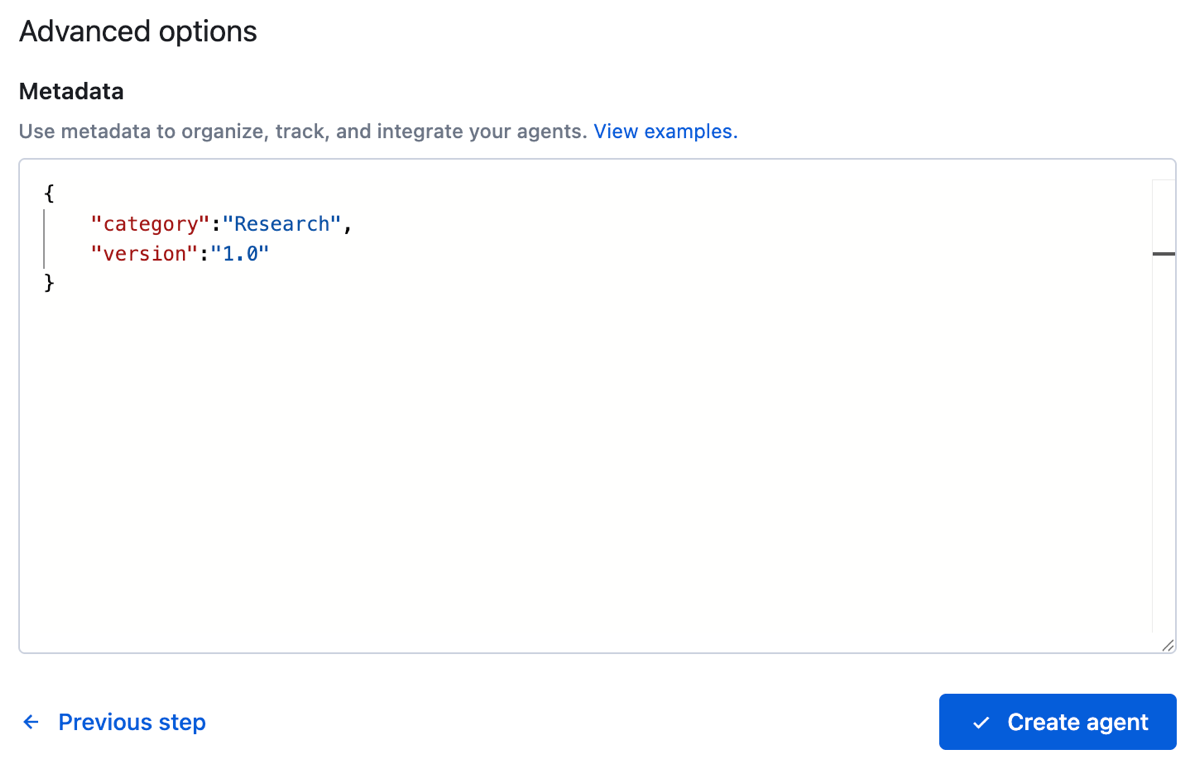
With all configurations complete, you can now create your agent and test it in the Console chat interface.
-
Click Create agent.
Step 6: Test the agent
After you finish the wizard, you get a message that the agent was created successfully.
- The Preview tab opens and you can now chat with your agent.
- (Optional) To update the agent's configuration from the previous steps, click the Settings tab.
- Because you configured the agent with the web_search tool, it will be able to retrieve information from the web to answer your question. For example, try asking, "What's the weather like in Tokyo today?"
If you leave this page, go back to Agents and select the Research Assistant agent from the list of created agents.
Create an agent with the API
Alternatively, you can create the same agent with the Create Agent API in this example.
We also have an Agent API tutorial notebook. Create a research assistant that searches academic papers and documentation, maintains conversation context, and provides cited responses.
Read on to learn about agents, how to craft custom instructions, tools in our platform, and other information.